A complete guide for viewing, downloading, sharing, and printing your images.
Receiving your gallery is one of the most exciting parts of your photography experience. Whether you booked family photos, branding portraits, headshots, or a mini session, your online gallery is where you’ll access and enjoy your final images.
If you’ve never used an online photo gallery before, don’t worry. This guide will walk you through exactly how to download photos from your CloudSpot gallery, save favorites, share images with loved ones, and order professional prints and products.
Opening Your Gallery
After your session is complete and edited, you’ll receive an email with a link to your online gallery.
Simply click the gallery link in your email to open your gallery homepage.
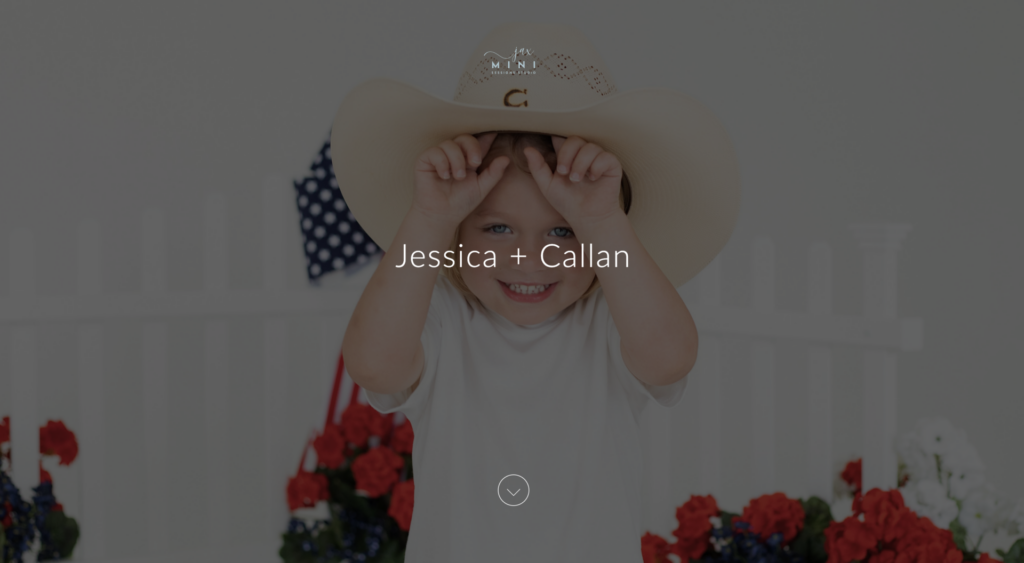
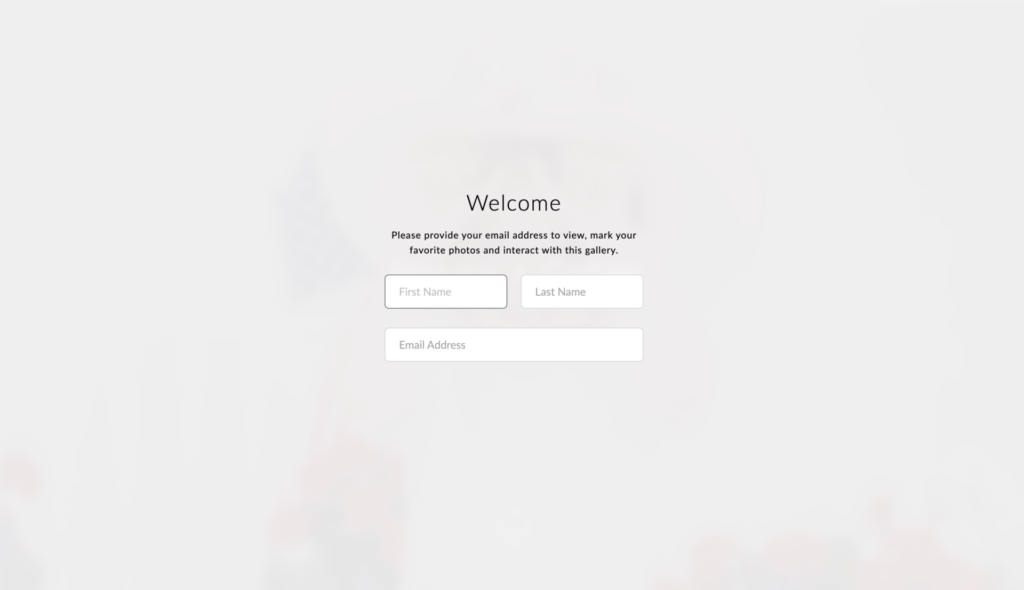
You’ll see a preview image and a down-arrow icon at the bottom of the screen. Click the arrow to enter the Welcome page, where you’ll be prompted to enter your information before accessing your gallery.
From there, you’ll be able to:
- View your images
- Download your photos
- Save favorites
- Share your gallery
- Order prints and products
Navigating Your Gallery
Once inside your gallery, you can browse through all of your images by scrolling through the gallery.
Your gallery is designed to be simple and mobile-friendly, making it easy to access from both computers, phones, and tablets.
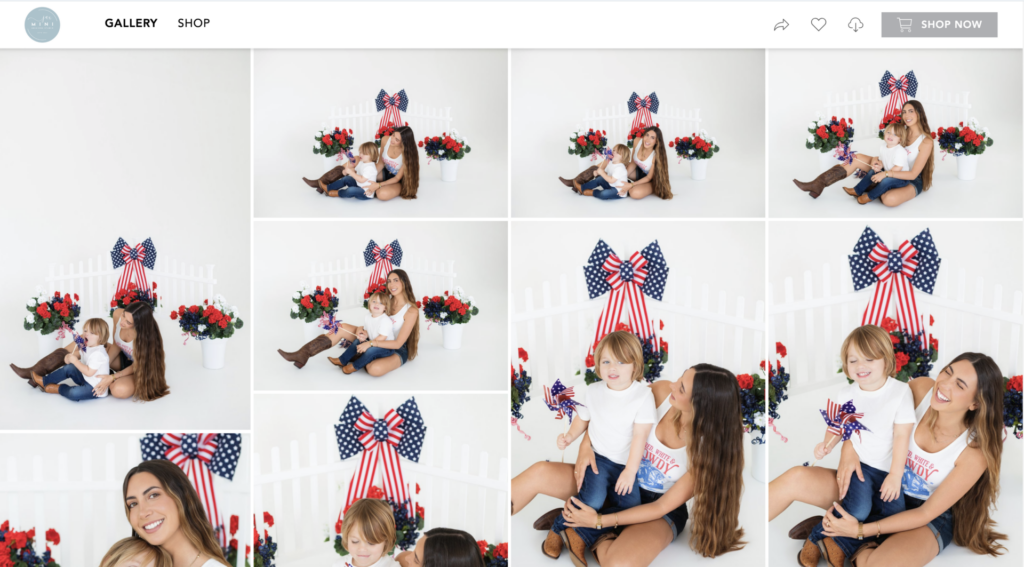
Desktop Navigation Bar
Take a look at the very top of your screen to see a full navigation bar. Use the options on the top left side of the screen to switch between the Gallery and Shop pages. In the top right corner, you’ll find an arrow, heart, cloud, and shopping cart icons that you can use at any time. Quickly share a link to your gallery, see your favorited images, download all photos in just one click, and browse your shopping cart!
Mobile Navigation
The mobile view is slightly different, but just as easy to navigate. In the top right corner, you’ll find the Share and Favorites icons. To download images, access the store, or move between different areas of the gallery, tap the three-line menu icon in the top left corner of the screen to open the full navigation menu.
Individual Image View
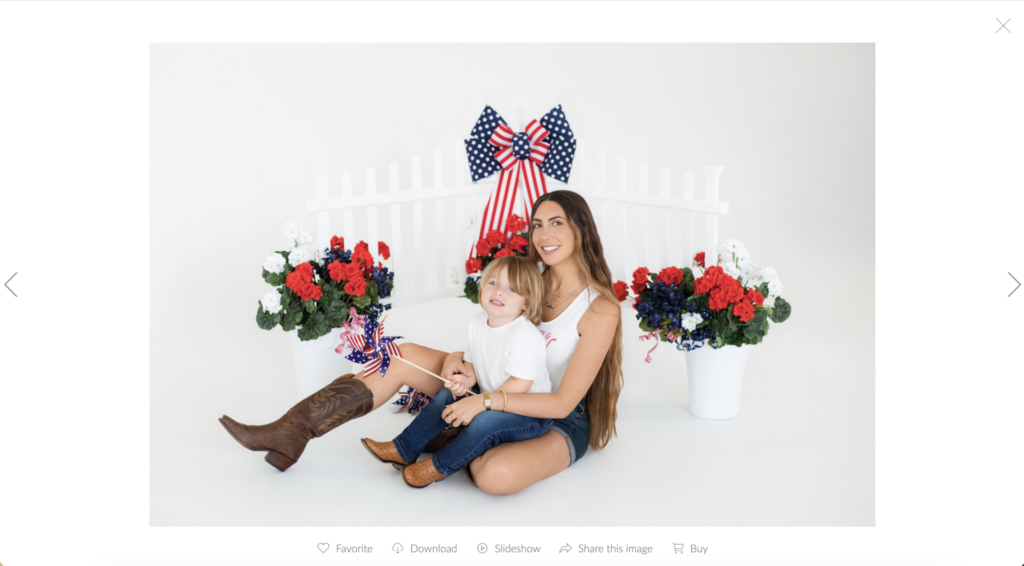
You can also click on any image to open it in a larger view.
From the individual image view, you’ll have the option to:
- Favorite an image
- Download the image
- Purchase prints or products
- Share the image
This view is especially helpful when you want to take action on a specific photo rather than your gallery as a whole. For example, you may want to download a single image, share a favorite with a friend, or order a print directly from that photo.
Saving Favorite Images
One of the easiest ways to narrow down your favorite photos is by using the heart icon.
Simply click the heart on any image you’d like to save.
This creates a list of favorites that you can easily revisit later when:
- Choosing images for printing
- Sharing selections with family
- Creating albums
- Comparing favorite portraits
Many clients find this especially helpful when selecting images for wall art or gifts.
Downloading Individual Images
If you’d like to download a single image:
- Open the image.
- Click the Download button.
- Choose your download option (if applicable).
- Save the image to your device.
This is a great option if you only need a few images for social media, email signatures, announcements, or quick sharing.
Please note that downloading individual images on a mobile device works a little differently than on a computer.
To download a single image on an iPhone:
- Tap on an image to open it in the individual image view.
- Tap the Download button and select either Full Resolution or Social Media Size.
- Wait for the image to fully load in your browser.
- Press and hold on the image until a menu appears.
- Tap Save to Photos (or Save Image, depending on your iOS version).
The image will then be saved directly to your camera roll.


Downloading Your Full Gallery
We highly recommend downloading your entire gallery to a computer first whenever possible.
Downloading to a desktop or laptop tends to be faster, more reliable, and makes it easier to back up your images for long-term storage.
On a Computer (Recommended)
- Open the gallery email from your photographer.
- Click the Download button.
- Uncompress (extract) the ZIP file containing your photos.
- Locate the downloaded ZIP file.
- Unzip (extract) the folder.
Now, your photos are saved to your computer! If you’d like to share the photos to your tablet or phone, you can upload the images from your computer to your device’s cloud service.
Moving Images From Your Computer to Your Phone
Add Images to iCloud (Apple)
- Sign in to icloud.com.
- Click Photos.
- Click the Upload Photos icon.
- Select all your photos and press Enter.
- Go to your iPhone or iPad.
- Connect to Wi-Fi.
- Open the Photos app.
- Your photos will automatically sync to your iPhone or iPad Photos gallery.
Add Images to Google Photos (Android)
- Sign in to photos.google.com.
- Click Upload.
- Select all your photos and press Enter.
- Go to your Android Phone or Tablet.
- Connect to Wi-Fi.
- Open the Photos app
- Your photos will automatically sync to your phone or tablet Photos gallery.
Note: This may take some time, depending on the number of photos and the speed of your connection.
Don’t have access to a computer? You can still download your photos directly to your mobile device.
Downloading Directly on iPhone & iPad
Before You Start
- Ensure that you are connected to reliable Wi-Fi. Note: Downloads will fail if you use cellular data.
- Ensure that your screen does not turn off (Tap Settings > Display & Brightness > Auto-Lock > Never). Note: Downloads will fail if the screen locks.
Download Your Photos
- Tap the Download link in the email from your photographer. A new Safari window opens.
- Tap the Download icon.
- Tap the Down Arrow inside the search bar.
- Once your download has completed, tap the file that is shown.
- Your iPhone will open up Files, a pre-installed iOS app. Or, it will prompt you to re-download Files.
- Tap the “ZIP” file. The app will automatically unzip these items for you.
- Tap the new Folder that appears.
- View your images.
Save Your Photos
- Tap “Select” in the top right-hand corner when viewing your images.
- Tap “Select All” in the left-hand corner.
- Tap the Box with an Up Arrow in the bottom right-hand corner.
- Select “Save Images” to save your images to your camera roll.
Downloading Directly on Android Phone or Tablet
Before You Start
- Ensure that you are connected to reliable Wi-Fi. Note: Downloads will fail if you use cellular data.
- Install the Files by Google app (free).
- Open Files by Google, tap Skip, and then tap Allow to accept the requested permissions.
Download Your Photos
- Tap the Download link in the email from your photographer. A new window opens.
- Tap the Download button. Wait for the download to complete.
- After the download completes, open the Files by Google app.
- Tap the Compressed icon.
- Tap the downloaded file with your photos.
- Tap Extract.
- Enter a name for the new folder with your photos, and then tap OK. Wait for the photos to extract from the downloaded file.
- After a list of your photos appears, press and hold the first photo listed until a check box appears next to the selected photo.
- Tap the select all icon.
- Tap the menu icon and select Share.
- Tap the Upload to Photos button.
- Confirm that the Google account displayed is correct, and then tap Upload. Note: This may take some time, depending on the number of photos and the speed of your connection.
- After the upload completes, open the Photos app. Your photos are available in your Photos gallery.
Sharing Your Gallery With Family & Friends
One of the best parts of an online photo gallery is how easy it is to share.
You can simply send your gallery link to family members, friends, grandparents, or anyone else you’d like to enjoy the images.
This allows others to:
- View photos
- Save favorites
- Order prints (if enabled)
- Download images (depending on gallery permissions)
Sharing a gallery is often much easier than sending dozens of individual image files.
How to Order Prints & Products Online
Preserve Your Memories
Your online gallery isn’t just for downloading your images. You can also order professional-quality prints and products. We highly recommend ordering through your gallery to ensure your images are printed exactly as intended with professional color accuracy and premium materials.
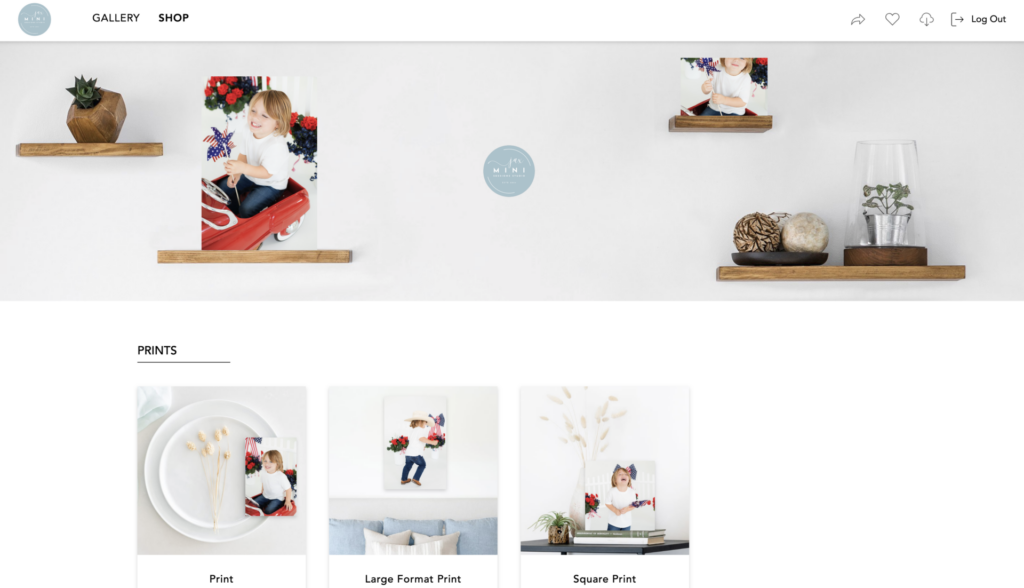
Available products may include:
- Prints
- Wall art
- Albums
- Cards
- Gifts and keepsakes
- and more!
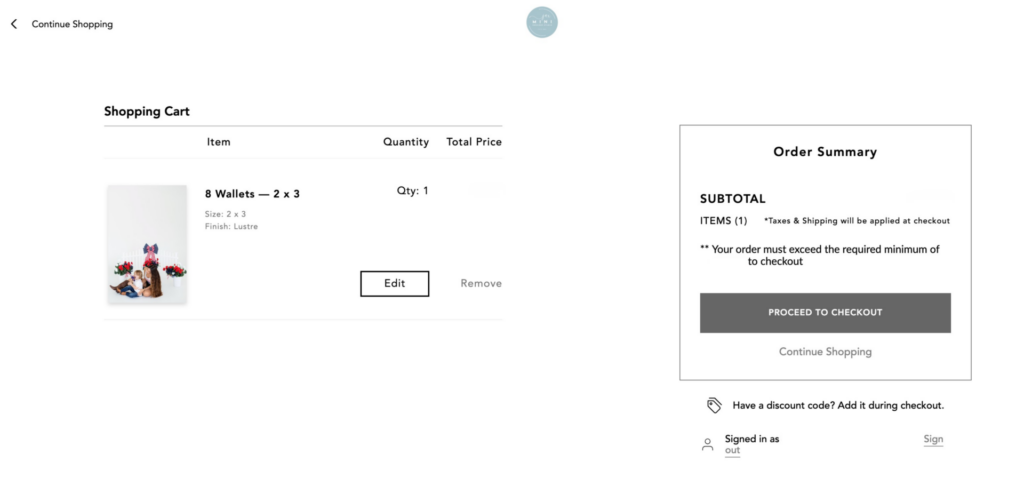
To place an order:
- Open your gallery.
- Click on the image you’d like to purchase.
- Select Buy.
- Choose your desired product.
- Select your size and customization options.
- Add items to your cart.
- Complete checkout and enter your shipping information.
Why We Recommend Professional Printing
We know it can be tempting to use a local drugstore or big-box retailer for printing, but professional print labs offer significant advantages. When you order through your gallery, your images are printed using labs specifically calibrated for professional photography.
Benefits include:
- Better color accuracy
- Sharper image quality
- Premium materials
- Longer-lasting products
- Consistent results
This is especially important for:
- Large wall art
- Framed prints
- Albums
- Gifts
- Images you’ll display for years
Professional printing helps ensure your photos look exactly the way they were intended to look.
Helpful Tips Before Ordering
Before completing your order:
- Review crop previews before ordering.
- Double-check personalized products for accuracy.
- Verify your shipping address before checkout.
Taking a few extra moments during checkout can help ensure everything arrives exactly as expected.
Shipping & Delivery
Orders are processed and shipped directly from the professional print lab. Production and shipping times vary by product, but most orders arrive within 1–3 weeks. You’ll receive tracking information once your order has shipped.
Final Thoughts
Your online gallery is designed to make preserving your memories simple and convenient.
Whether you’re downloading your images, sharing them with family, selecting favorites, or ordering professional photo prints, everything can be done directly from your CloudSpot gallery.
We highly recommend downloading and backing up your images as soon as possible, then taking time to enjoy them beyond your screen through prints, wall art, albums, and keepsakes you’ll treasure for years to come.
If you have any questions about your gallery, downloading photos, print products, wall art sizing, or album options, we’d be happy to help. Feel free to contact us anytime at studio@jaxminisessions.com.
Ready to create new memories? Visit www.JaxMiniSessions.com to book your next portrait session at our Jacksonville, Florida photo studio.
LEAVE A COMMENT
0 Comments